
Slow Cooker Pepper Jelly Pulled Pork
Here at Grandma Jones' Pepper Jelly, we don’t just sell pepper jelly. It isn’t all we’re here to do. We also like to give you ideas about what kinds of things you can do with your pepper jelly.
Many of our customers know that pepper jelly goes great as a finger food addition. For instance, you can throw it on some crackers with cheese and have a really tasty and filling snack for an upcoming party.
Lots of people do that. What not a lot of people do is to make slow cooker pepper jelly pulled pork, which is a recipe of which we are especially fond.
Pulled pork is a perennially popular food. The only down-side is that many people make it the very same every time. Barbeque sauce is a fine addition to the slow cooker, but let’s change things up a bit now with the addition of some tasty pepper jelly.
Let’s check out this recipe for pepper jelly pulled pork, and we’ll give you some ideas along the way for which pepper jelly varieties will go well with what you’re making.
Recipe planning note: This article is a pulled-pork method overview. Its ingredient suggestions do not specify every seasoning or cooking-liquid quantity. Choose a complete recipe written for your roast and appliance, then use these notes to plan the pepper jelly flavor.
Step 1: Gather Your Ingredients
There are a few core elements of slow cooker pepper jelly pulled pork that you’ll need no matter what. The extras and additions will be completely up to you, but here, we’ll give you some ideas.
Some ingredients you’ll need include:
- Pepper jelly, measured according to your complete pork recipe
- Pork shoulder or butt (2-4 pounds)
- Half an onion, chopped
- Salt
- Pepper
- Garlic powder
- Onion powder
- Mustard, sauce, or another glaze-type condiment
Step 2: Coat the Pork
Before we get to the main event of adding the jelly and cooking the pulled pork, we first have to prepare the pork butt or shoulder itself.
Depending on what kind of glazes and seasonings you’ve gathered, this is where you’ll want to apply them to the pork.
Apply the seasonings from a complete slow-cooker pork-shoulder recipe. If preparing ahead, cover and refrigerate the pork at 40°F or below, including overnight; do not leave it on the counter to marinate. Thaw frozen pork safely before slow cooking.
Step 3: Prepare the Slow Cooker
The next day, or whenever you’re ready, you’ll want to get the slow cooker ready to go.
Lots of cooks will tell you they add onions to meals not primarily for eating, but for the flavor they lend to the main course. And that applies here.
After spraying the slow cooker with cooking spray, chop up half an onion and throw the pieces into the bottom of the cooker.

Step 4: Add Pork and Pepper Jelly
It’s now time for pork itself, and here is where you’ll be able to get a little creative with your pepper jelly.
Add the seasoned hunk of pork to the slow cooker, and then choose your pepper jelly. Choose a flavor, but follow your complete pork recipe's sauce and liquid quantities rather than automatically adding a whole jar. This will be based on what kind of flavorings you and your fellow eaters will enjoy.
For example, if you’re just starting out cooking with our pepper jelly, then traditional pepper jelly might be the one for you.
However, if you’re a fiend for the really hot stuff, you’ll want to make this slow cooker pepper jelly pulled pork with our habanero pepper jelly. There’s no doubt about it; this one adds a kick that you’re sure to notice immediately. You can also go sweeter with a variety such as the cranberry pepper jelly.
Measure the jelly specified by your complete recipe. Jelly does not replace the cooking liquid that recipe requires. Keep a separate clean portion for adjusting the finished sauce.
Step 5: Cook the Pork
Now, we’re going to cook the pork. The cooking time depends on the roast size, the cooker and its setting. Plan around the complete recipe rather than shortening cooking to match the time available.
A 2–4 pound range covers substantially different roasts, and cookers also differ. Follow a complete recipe for the roast size, cooker capacity, liquid amount and setting instead of relying on a universal five-hour or eight-hour schedule.
Check safety with a food thermometer. A whole pork cut must reach at least 145°F with a three-minute rest, but pork shoulder normally needs further cooking to become tender enough to shred. Follow the complete recipe for that texture; time or easy shredding alone does not replace a temperature check.
Step 6: Pull the Pork
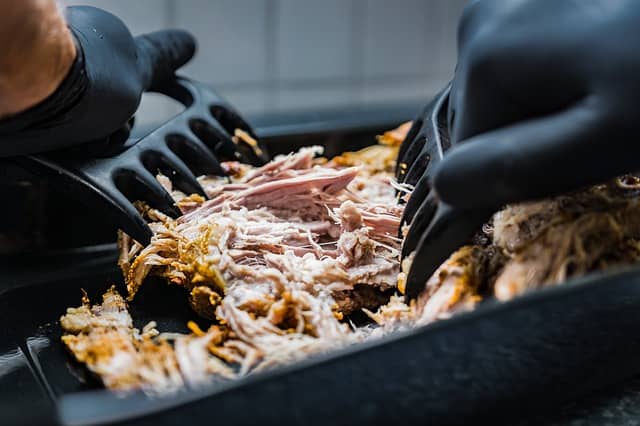
At the end of your cooking time, remove the pork from the cooker and pull it all apart. You’ll probably encounter pieces of gristle or fat that you can discard.
Once the pork is pulled, put it all back in the slow cooker and let it cook for another half hour or so.
Step 7: Remove and Enjoy
Serve the finished pork promptly or keep it hot at 140°F or above. Do not turn off the cooker and leave a large batch cooling on the table. Divide leftovers into shallow containers and refrigerate within two hours, or one hour above 90°F.
If you’ve never had slow cooker pepper jelly pulled pork before, you’re in for a treat. While pulled pork tastes amazing on its own, pulled pork with pepper jelly present throughout the cooking process is truly incredible.
It’s going to add that extra bit of flavor you’ve been looking for, and we think your friends, family, and other guests will also enjoy this new spin on a classic.
To see all of your options, check out all of Grandma Jones' Pepper Jelly flavor options now, including our variety packs!
Build a pulled pork menu
- Pepper jelly coleslaw: Add a crunchy side for pulled pork sandwiches.
- Cornbread muffins: Make individual cornbread portions for the table.
- Pepper jelly BBQ sauce: Make a separate sauce for serving with the pork.
Store and Reheat Pulled Pork
Use refrigerated leftovers within three to four days, or freeze for longer storage. Reheat leftovers to 165°F using the stove, microwave or oven. USDA does not recommend reheating cold leftovers in a slow cooker; transfer already reheated pork to a preheated cooker only for hot holding. Sources: safe minimum temperatures, leftover storage and reheating methods.